Found some old Seiko and Citizen commercials on youtube.
First up is a 1978 Seiko commercial from Japan featuring a young Kate Bush. For real.
Five more after the jump!
Thursday, July 21, 2011
Tuesday, July 12, 2011
Video Review: Grand Seiko Spring Drive GMT SBGE001
After 2 months of ownership, it was time to put together a video review of this sublime watch. Hope our loyal readers enjoy!.
Friday, July 8, 2011
New Citizen Calibre 2100 Models Spotted
Spotted two new Calibre 2100 models on the Citizen US website.
AV0050-54A
Pict from Citizen
AV0050-54H
Pict from Citizen
Sunday, July 3, 2011
It Was a Simple Surgery
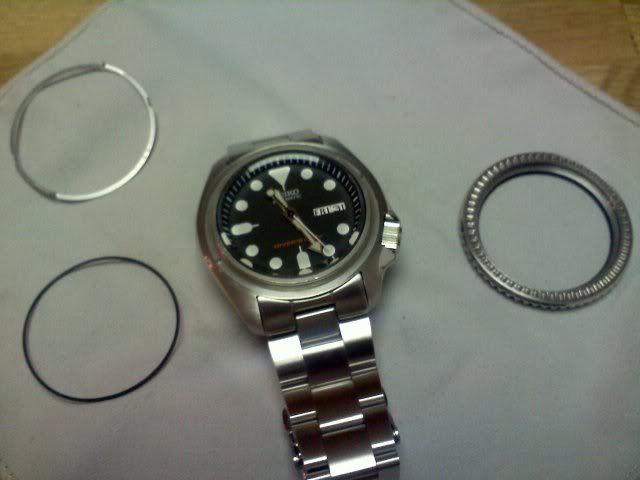
I took my Seiko SKX007 into the pool a few times last week and soon noticed the normally smooth bezel action had turned very stiff. Decided to take a look and see what was wrong.
Popped the bezel off with a Swiss Army Knife. The bezel assembly is composed of three simple parts....the bezel itself including the insert, the bezel spring, and a simple gasket. I find the bezel spring to be an interesting contraption. Two posts point down and will attach to corresponding holes in the case. Two flat springs are elevated above the ring which will engage with the indentations on the underside of the bezel to deliver the measured clicks and will also prevent the backward movement (clockwise) of the bezel. The gasket provides the smooth feeling of a normally operating Seiko bezel but it requires lubrication with silicone grease. Since the bezel assembly is not protected from water, this gasket can dry out.
One look at mine and sure enough it was completely dry. Fortunately it was not torn or otherwise damaged. A quick application of silicone grease to the gasket, re-installation into the bezel and a simple snap of the bezel back on the case and its good as new.
Total project time took me about 15 minutes including the picture taking and cost me nothing. Perfect. Sometimes you win.
Anyway, since I had it apart, I decided to snap some pictures and post them up.
Subscribe to:
Comments (Atom)


